Our Solar Sales & Installation Process
If you’re interested in a solar energy system for your home, then you’ll likely want to know what the process is like.
Here are the keys steps that happen when you contact us at Jamar Power Systems when you’re considering producing low-cost, clean and renewable solar electricity for your home.
Step 1: FREE Solar Analysis & Review (can be done in person or by phone and Internet)
This first step gathers your last twelve (12) months electricity usage, which is measured in kilowatt hours (kWh) used for each month. This lets us know how much electricity your solar energy system needs produce in order to meet your household’s needs.
Next we look at the area you’re considering for installation of the solar panels. That’s usually the roof(s) but solar PV can also be mounted on the ground or on top of existing or new backyard patio cover structure (if strong enough).
Information required for a FREE Solar Analysis:
1) how much electricity your household used the last 12 months (you help provide).
2) where the solar panels will be installed, which way they’re facing, and their angle (you point and we provide).
Note that if you’re considering a ground or patio cover mount then the route back to your main electrical service breaker is important and so we need to see that in person.
3) your home’s exact spot on planet earth using latitude and longitude (we provide).
4) your current main electrical service panel max amps and breaker configuration (you provide a photo or we see in person).
Once we have all that data we can feed it into our custom solar analysis software to see how many of what kind of solar panels you need, how much energy can be produced, and what the immediate and long-term savings would be, if any.
If the math is in your favor and shows good savings and you like what you see and hear about Jamar Power Systems, our 30+ years in business, tens of thousands of projects installed, and excellent customer reviews ratings (and you don’t mind us bragging about it a little), then it’s likely you’ll proceed and sign an agreement to have us provide and install your solar energy system and any applicable financing
Of course cash and your own financing are always welcome payment methods also. In fact, credit unions and home equality lines of credit at their own banks are used by many homeowners.
Step 2: Engineer Makes a Site Visit
Once the initial solar agreement is signed and submitted to our office, and all the paperwork is in order, we will then contact you to arrange for a final site visit by one of our solar engineers.
There are several things our engineers check to ensure you get the best solar panel installation for your home.
First, they will check your home’s electrical status to ensure compatibility with the solar energy system.
Second, the engineer will double-check your electrical panel (that gray box with your breaker switches usually on the side of your garage outside) to see if it will accommodate the new solar breaker required or does it need to be upgraded to meet the panel power output.
Third, the solar engineer will also evaluate your roof’s condition to make sure that it’s structurally sound enough to hold the solar panels.
If it’s a ground mount they will survey the area and path bath to the main service panel. If it’s a patio cover, then structural integrity will be measured as well as the path back to the main service panel.
Lastly, the solar engineer will use a device that measures, records, and reports the monthly projected shade that may cover parts or all of the area where the PV panels are to be installed.
Note that this site visit is different than the preliminary site visit by your Solar Consultant which was made to assess your energy needs and the type of system needed at your home.
This Engineer’s Site Visit confirms all information from the initial visit as well as looks at few more engineering details that are needed for city permit plans, and so it must be performed by one of our licensed solar or electrical contractors.
We’ll use this final engineer’s site data to confirm system installation can proceed as planned, or identify anything that’s different enough to affect previous projections, or will change, delay, or even prevent the installation altogether (examples: too much shade, old roof needs to be re-roofed first, ground mount area is subject to seasonal flooding, patio covers not strong enough, etc.)
Step 3: Getting the Right Paperwork
Fortunately for you, we’ll do most of the paperwork work for you before your solar panel installation.
If there are financing documents needed, we’ll work with you to help get that done at this stage also.
Step 4: Engineering Plans for Permit
Once we have site measurements and confirm electrical service panel specifications, we’ll begin drawing up the engineering plans to apply for your city permit. The permit request is submitted and awaits city approval to move forward with the installation. Any changes the city may request are made asap and resubmitted for approval.
Step 5: Ordering Equipment
This is something that usually happens behind the scenes for most people’s solar panel installation.
In stage one our Solar Consultant helped you select which PV panels, panel quantity, and inverters are to be used. That was either confirmed or had to be changed after the engineering site visit and agreed to by all parties.
At this stage, we’ll be ordering that equipment per the engineering plans and our agreement with you.
Your installation time will depend on 1) how fast the city approves your permit, and 2) the delivery speed of the solar equipment manufacturers or distributors.
Step 5: Solar Panel Installation and Connection
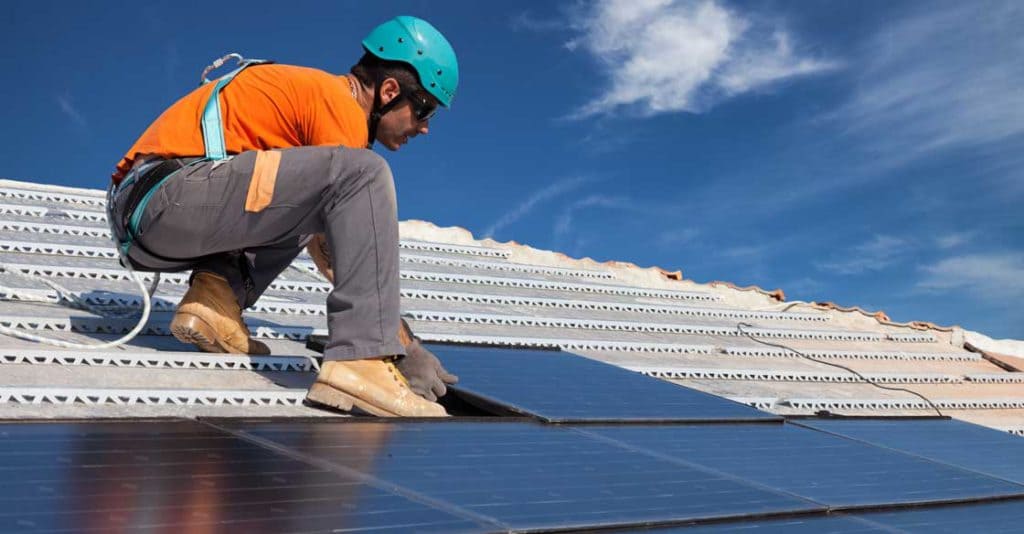
Once we have city permit approval and your solar equipment has arrived, we’re ready for installation. Our office will contact you to schedule the installation.
The big day is finally here. By this point, everybody is ready to go and it shouldn’t take more than a couple of days of installing solar panels at most, depending on your house and chosen system.
Step 6: City Permit Approval of Installation
Once installation is completed we notify the city to get final city permit approval of the installation.
The city will schedule to send an inspector out to examine the installation and sign-off to approve the installation (if it was done per the permit engineering plans).
We send that permit approval to the utility company to show the system has been installed and approved by the city and ready to be turned on.
The utility company then completes their file, changes your account type to solar, and issues permission to turn on and operate your solar energy system (PTO).
This is a fairly simple inspection process, but be aware that it can take anywhere from several days to a couple of weeks before your city will inspect.
Step 7: Permission To Operate (PTO) is Granted by Utility Company.
The final step is waiting for your utility company to place the final inspection city approvals in your file and issue permission to turn on and operate your solar energy system (PTO).
This usually takes just a few days after final city permit inspection but can be weeks if the utility company gets backed up.
Once PTO is issued we then schedule with you to come out to your home, turn on the solar energy system, and go through your owner’ manual and some basic operations with you.
Then you’re officially generating your own clean, renewable, and low-cost electricity!
Get a FREE Solar Analysis to see if solar energy is right for your home.
Use our FREE San Diego Solar Calculator to see how many high-efficiency solar panels your home needs and what a solar energ system would cost you.
- 2026 Federal Tax Credit Changes For Solar Energy Systems - July 8, 2025
- How Solar Batteries Work - March 4, 2024
- Solar Battery or Generator for Emergency Backup Power? - January 30, 2024

